
How to connect to a Java Server on Minecraft Bedrock on Xbox (Series X/S & Xbox One) & Switch
Bedrock Edition | October 21st, 2025
*Please Note this is an internal knowledge base for CML and their guests.
Minecraft: Bedrock Edition offers plenty of perks, and one major advantage is the ability to cross-play when Geyser is running on your server. With this setup, players using devices like Xbox or Nintendo Switch can join a Java Edition world and play together. The process isn’t exactly plug-and-play though — it takes some tinkering with console settings to get connected properly. Because this method doesn’t always work smoothly for everyone, we’ve put together this guide to walk you through how to join a Minecraft server on Xbox and Nintendo Switch so you can start gaming with friends right away.
How to Add a Minecarft Server on Xbox
If you’re connecting to a Bedrock server from an Xbox, you’ll need to adjust a few settings on your console first. Specifically, you’ll be modifying the system’s DNS configuration. This means replacing your current DNS addresses with the ones shown in the table above. Keep this in mind as you follow the steps below to join friends in Minecraft: Bedrock Edition.
These DNS changes won’t affect your other games or apps, but if you ever prefer to switch back, you can simply restore your original DNS settings at any time.
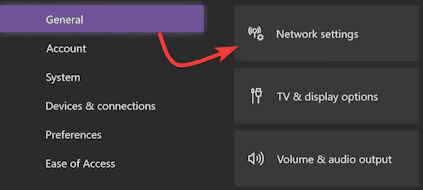
1. Open your Xbox settings, then click General and select the Network Settings options.
2. Go to Advanced Settings and choose the DNS Settings option, then press Manual.

3. Beging to tweak the Primary IPv4 Address to 173.82.100.84 (for non-internal users find your DNS provider for your hosting provider)
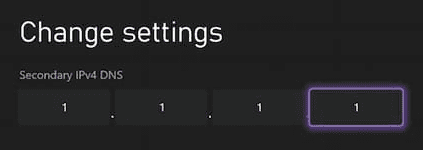
4. As for the Secondary IPv4 DNS, enter 1.1.1.1 (This is Cloudflares DNS) for its field. this is to ensure you can still join in other games.
5. Save these changes so the console can perform a connection test to confirm it works.
How to Add a Minecraft Server on Nintendo Switch
Just like the Xbox configuration, you’ll need to update the DNS settings on your Nintendo Switch. Choose one of the DNS addresses listed in the table above and apply it to your console’s network setup. Don’t worry—these changes won’t interfere with your other online games or multiplayer sessions. Once you’ve selected your preferred address, follow the steps below to complete the setup and start connecting to Minecraft servers.
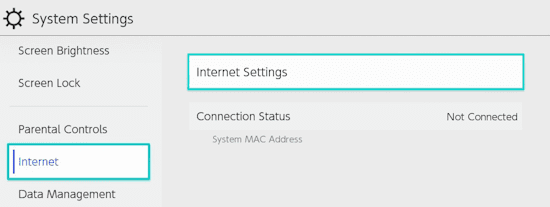
1. Head towards your System Settings from the home screen on your console.
2. Afterward, scroll down and select Internet and click Internet Settings on the right.
3. Wait for searching networks to stop, then press on your currently used one.
4. In this new area, click Change Settings and switch DNS Settings to Manual.
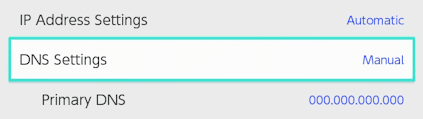
5. Proceed to enter your desired address for the Primary DNS option.
6. Do the same for the Secondary DNS settings, but use 1.1.1.1 (again this is for you to still play your other games).
7. Once you’re finished, click Save on the right and you’re ready to go.
Joining Java Server from Bedrock
Once you’ve updated your DNS settings or used a third-party app, joining a Bedrock server works the same way across all supported consoles. The following steps apply universally, so it doesn’t matter which device you’re using. When you’re ready, follow the instructions below to being connecting and start playing.
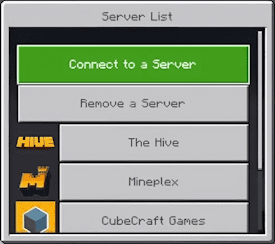
1. Open your Minecraft application and click Play from the main menu.
2. Afterward, head to the Servers tab and join any features one.
3. Once in-game, click Connect to a Server from the new menu that appeared.
4. Continue to enter the desired Server Address found here and Port accordingly.
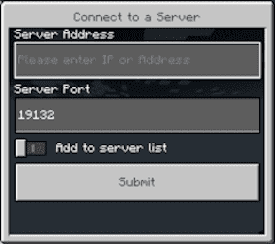
5. Toggle the Add to Server List and press Submit to begin playing on the server.